Watch Folders

Step-by-Step Guide: Setting Up Watch Folders in reaConverter
Create Folders
Create an input folder (your 'watch folder' for automatic file conversion) and an output folder (where converted files will be saved).
Configuration File
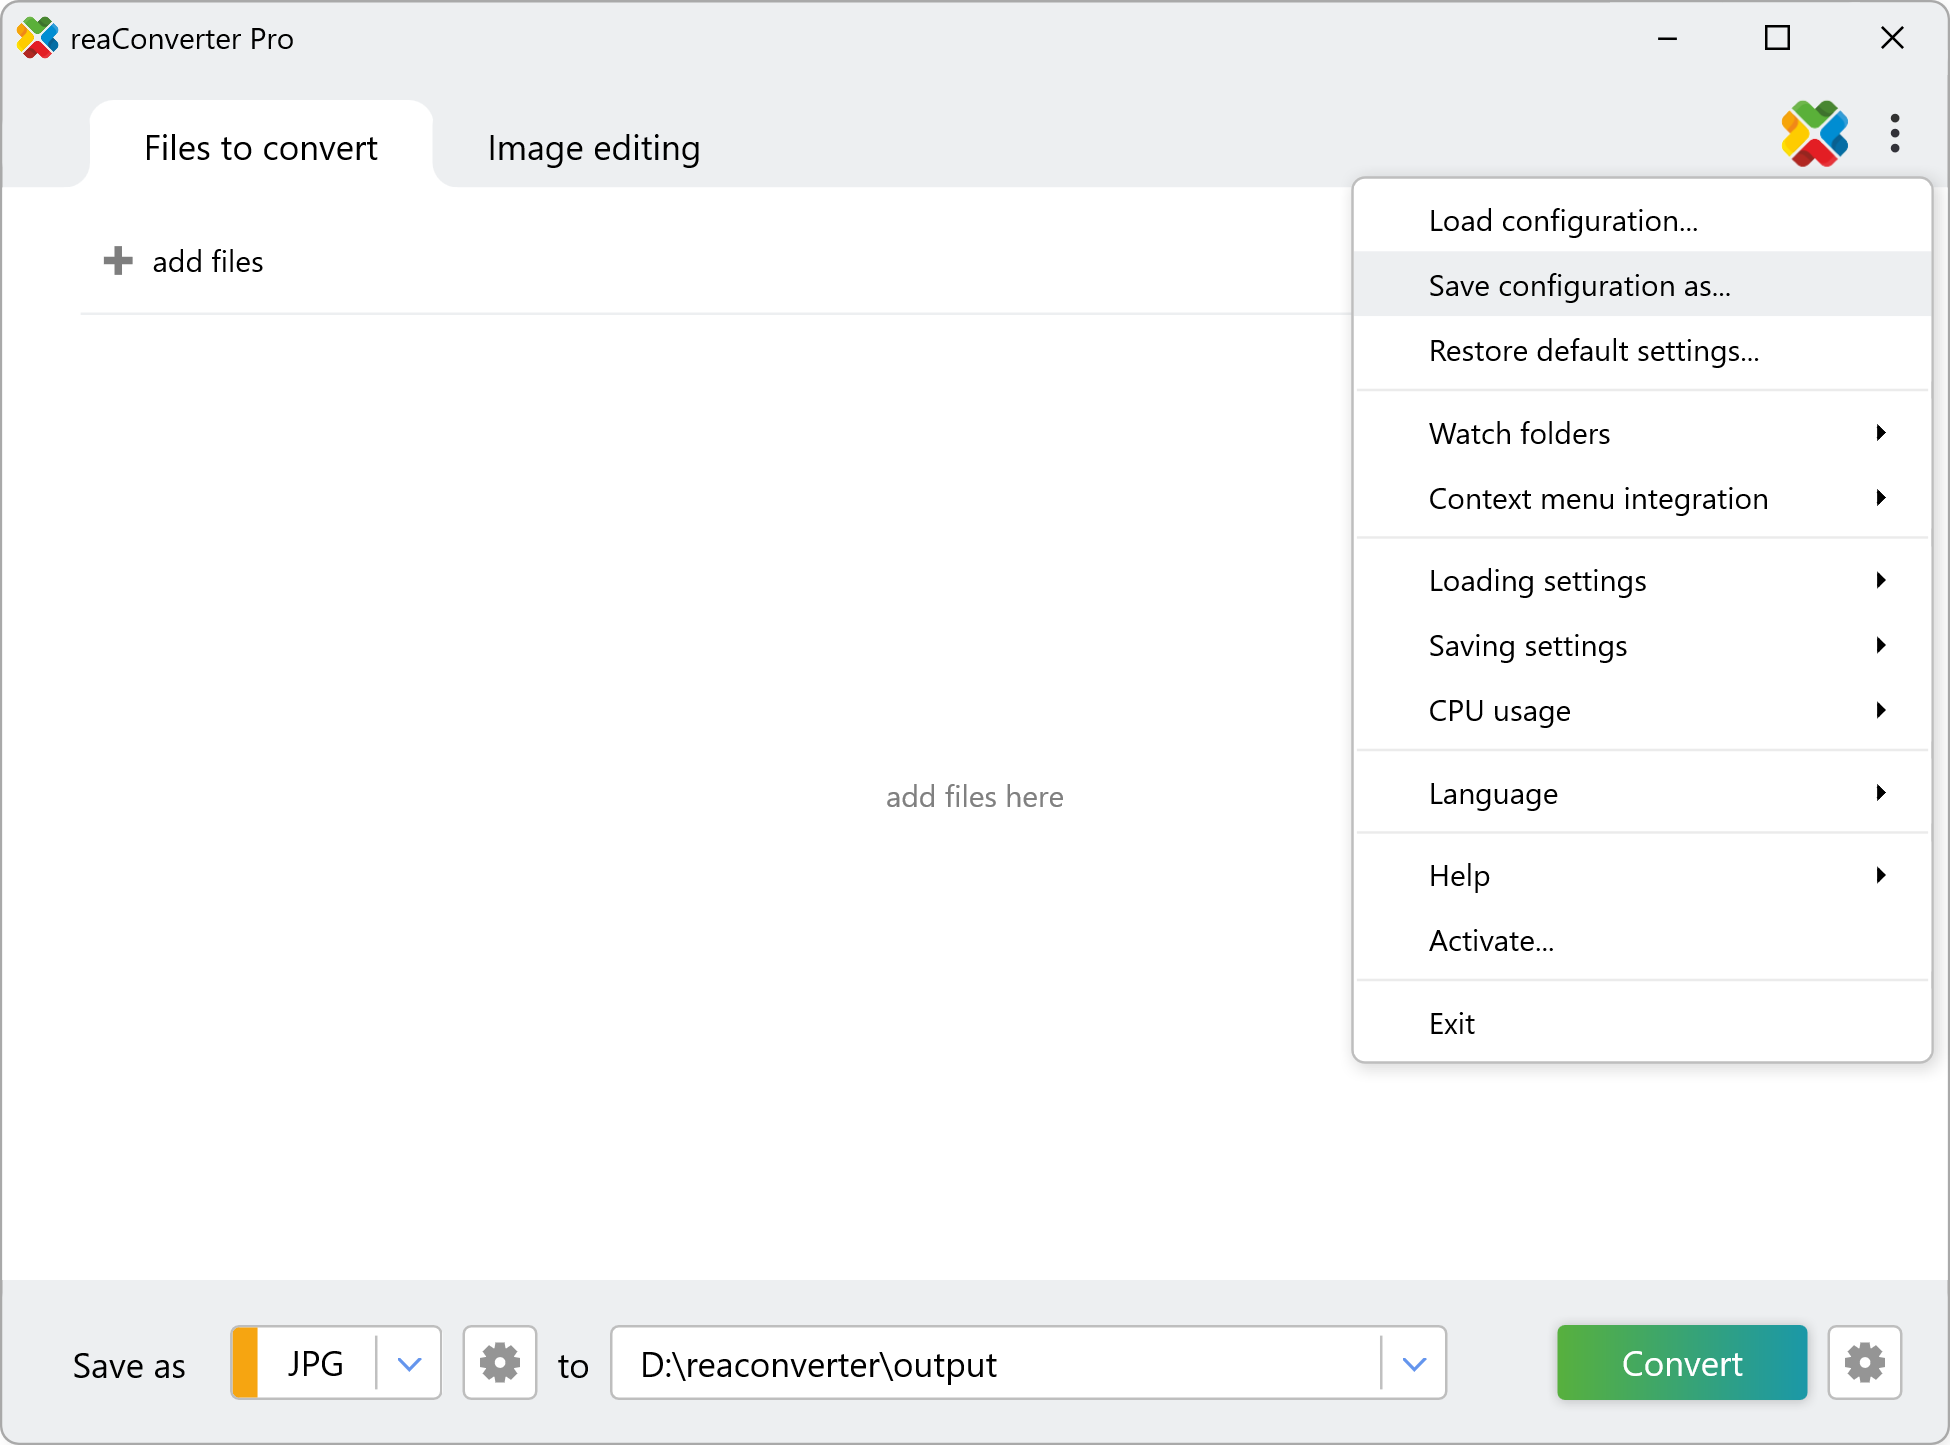
Configuration (.cfg) file stores all conversion settings (output format, destination folder, file options) for reuse.
How to Create a .cfg File
- Configure your settings in reaConverter (output format, folder, file naming, etc.).
- Save as .cfg file: Click the Menu → Save configuration as to create your preset.
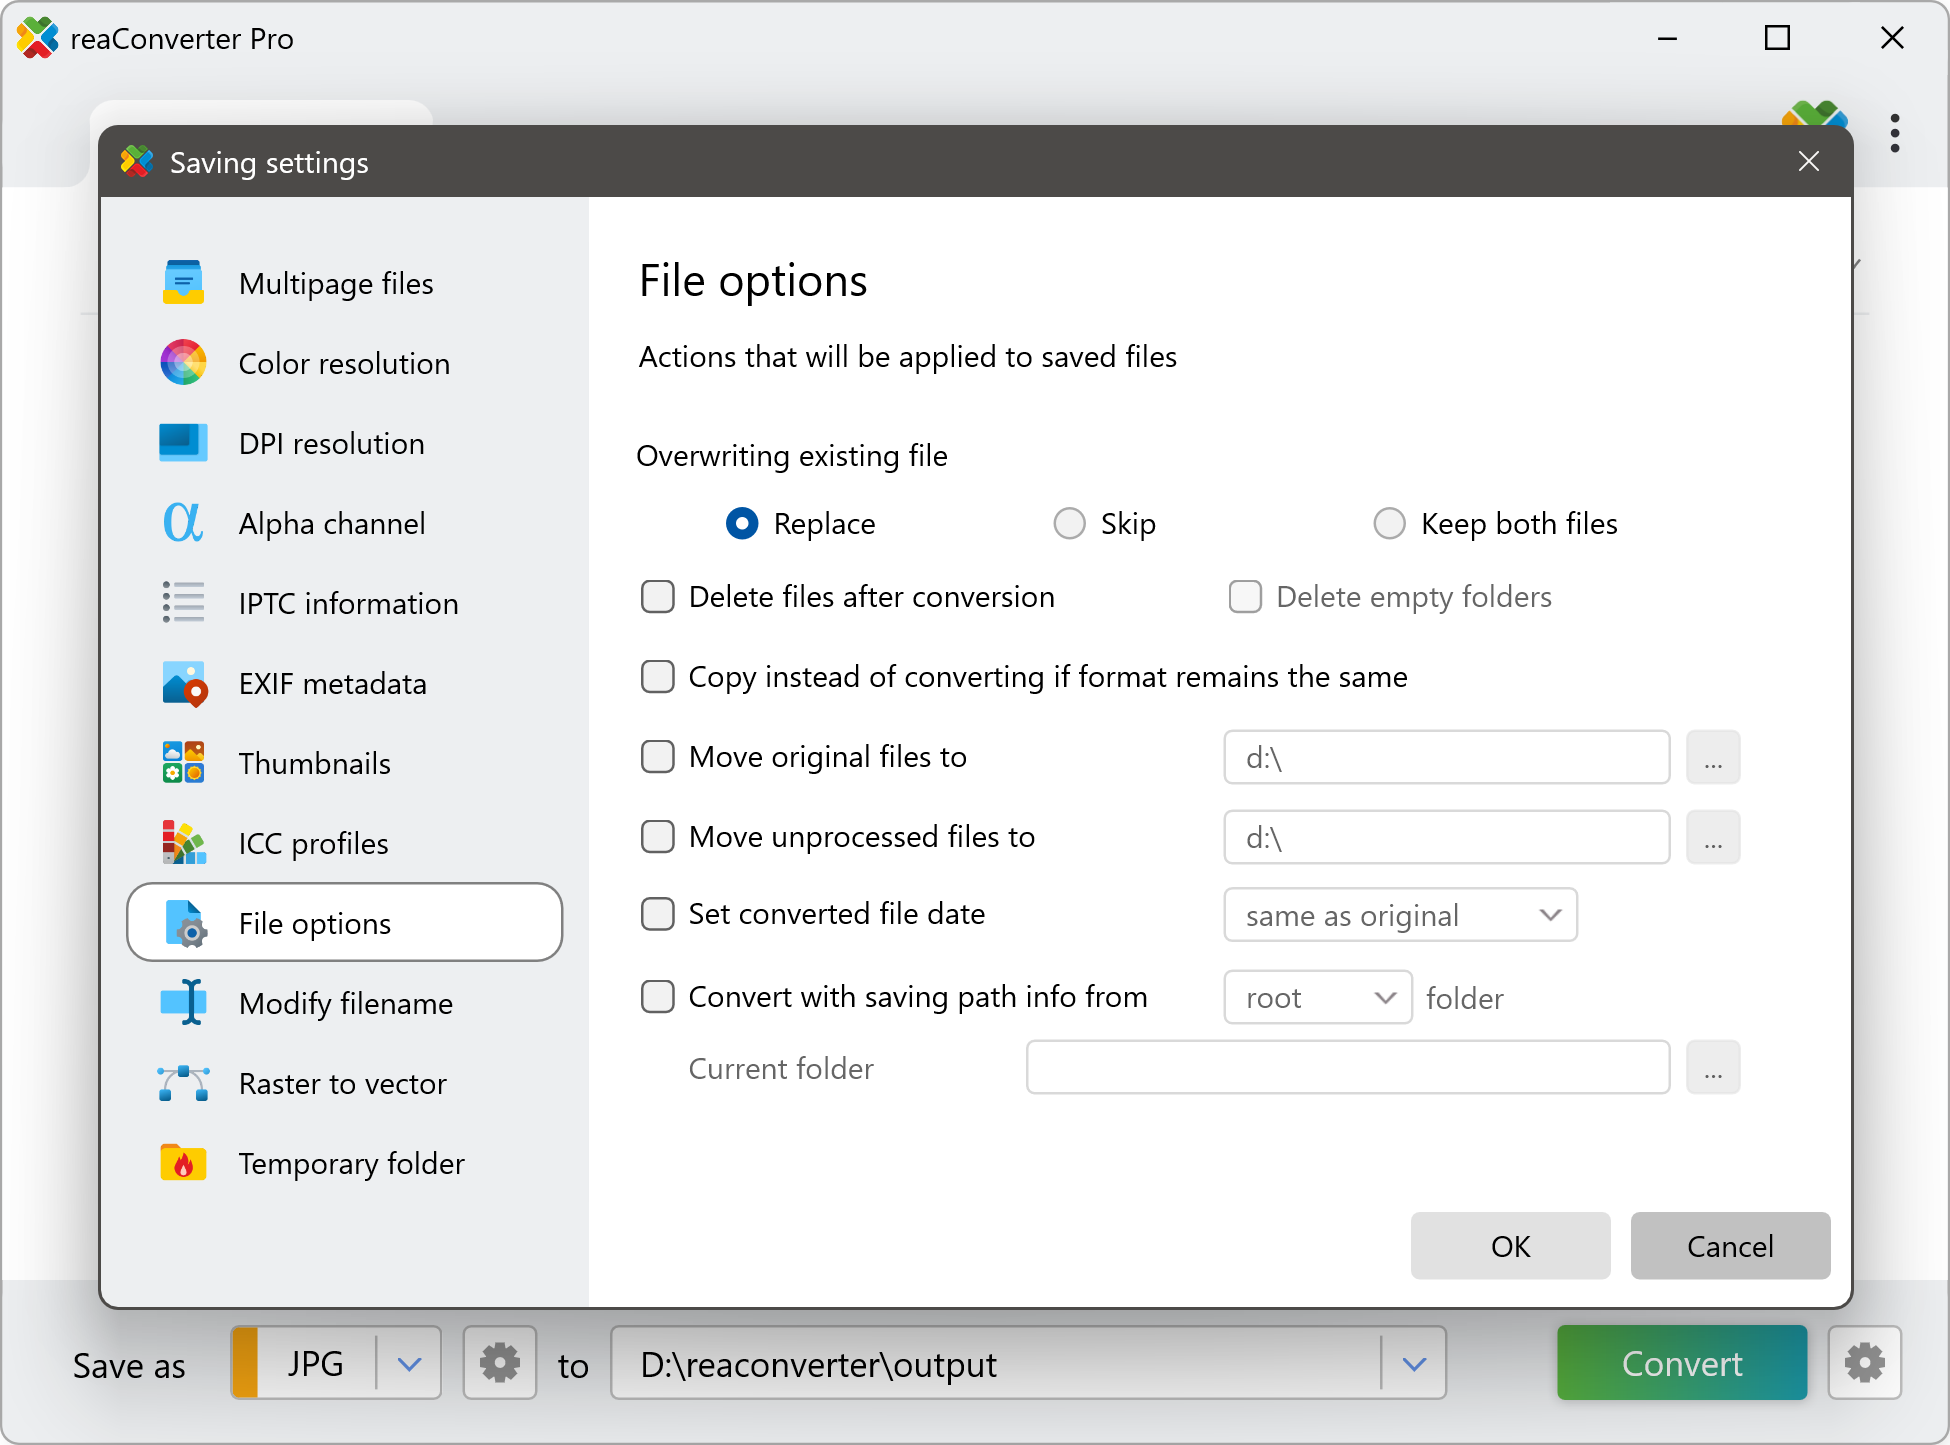
The Watch Folders feature works with all of reaConverter’s automatic commands, streamlining file management with actions like:
- Moving original files after conversion
- Moving unprocessed files
- Deleting files post-conversion
Configure your preferred settings under Menu → Saving Settings → File options and save these rules as a .cfg file.
Action File
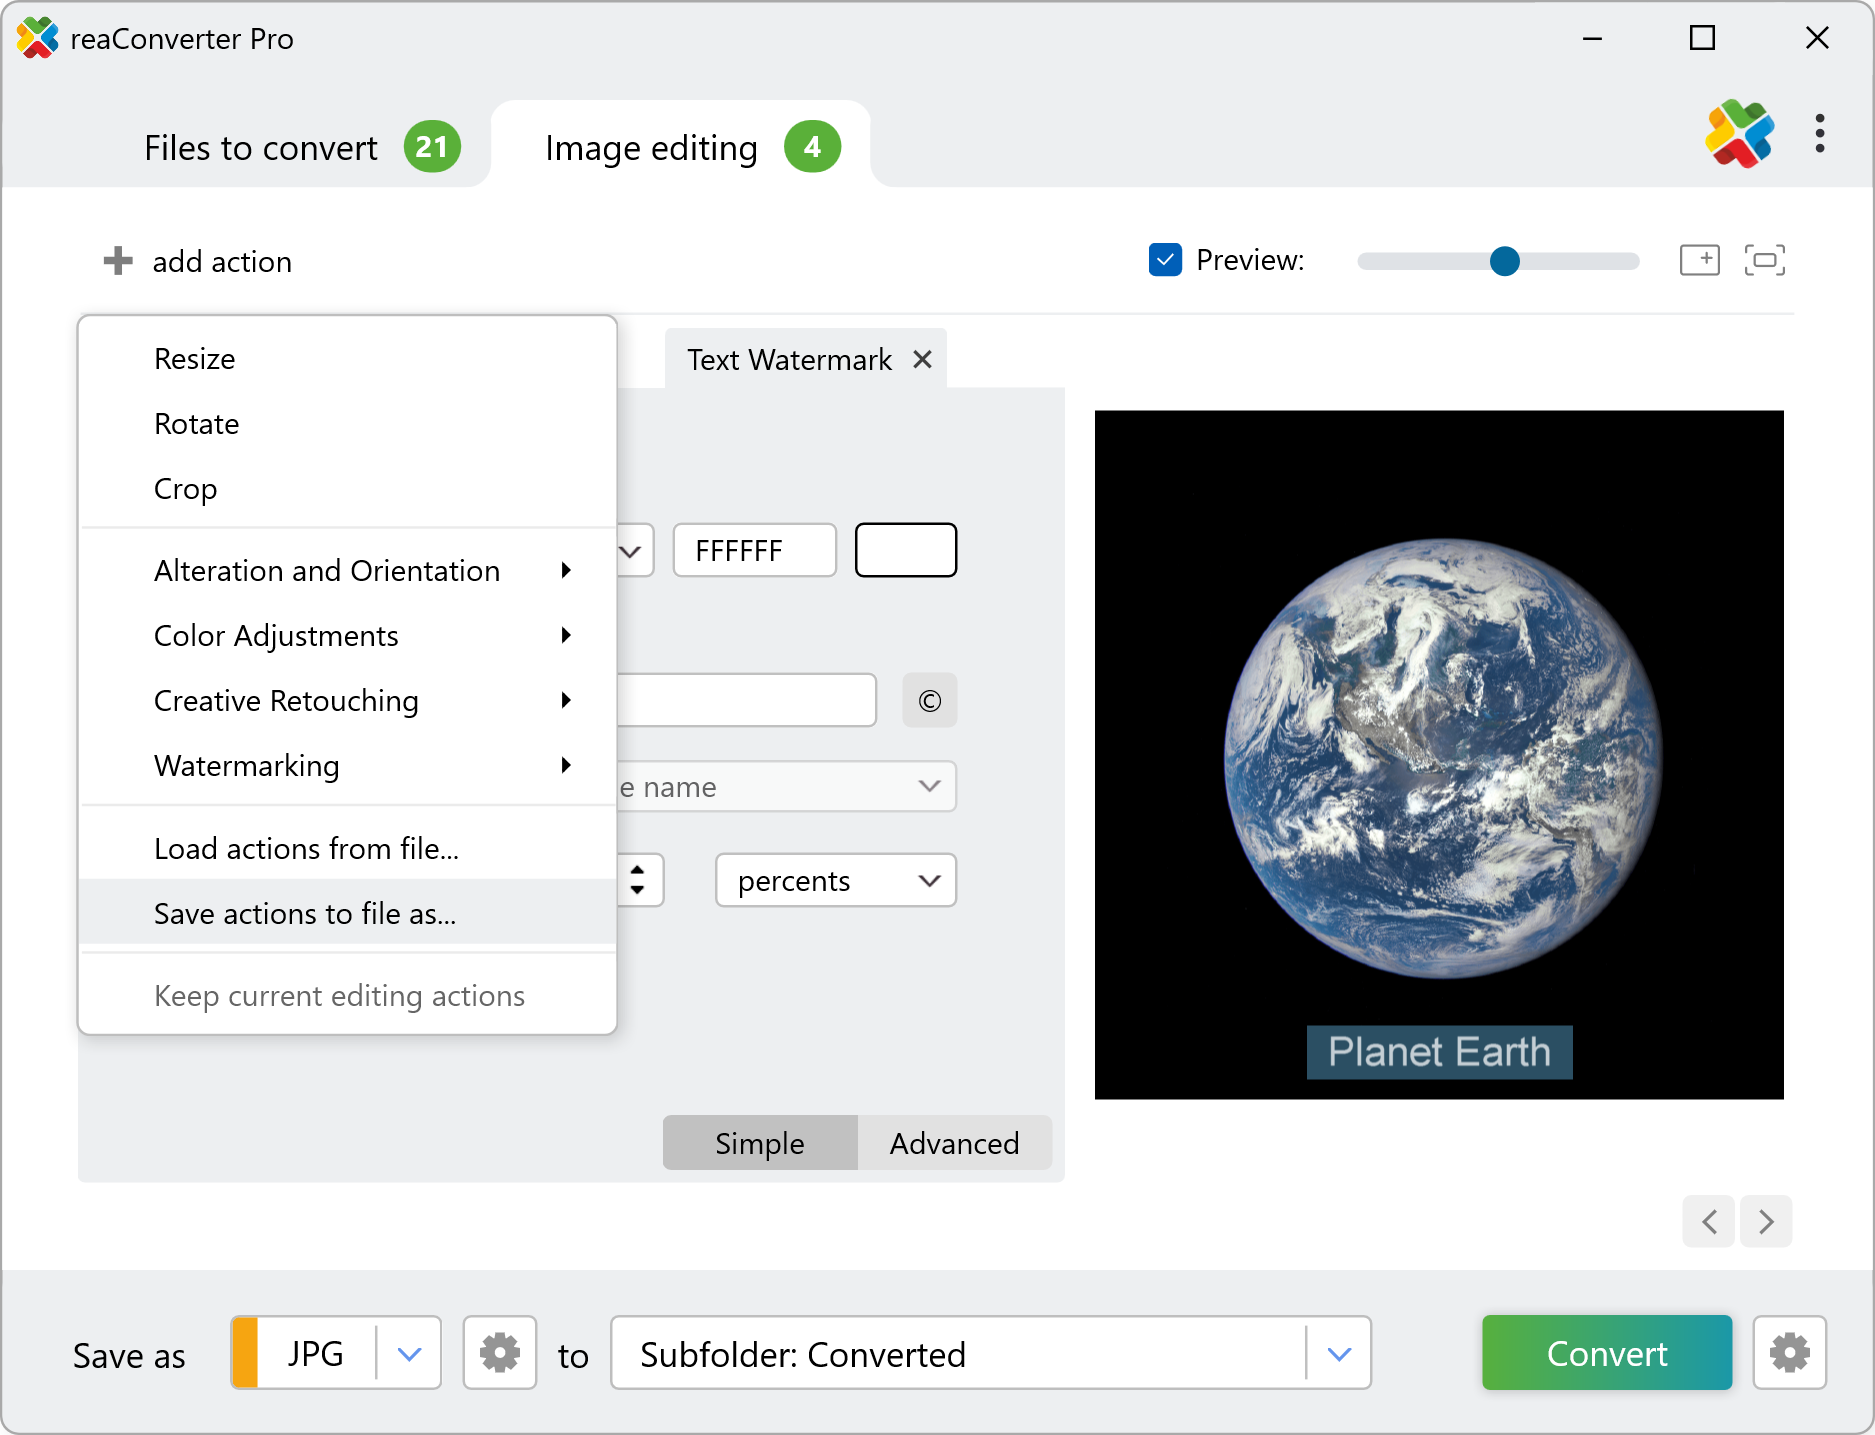
Action (.act) file saves your chosen image edits (e.g., rotations, watermarking, brightness adjustments) for reuse.
How to Create an .act File
- Select editing features (resizing, cropping, watermarking, etc.) in the Image Editing section.
- Save as .act file: Click Save actions to file as to store your preset.
How to Set Up Watch Folders in reaConverter
To enable Watch Folders in reaConverter, open the Menu, select Watch folders, and toggle the switch ON.
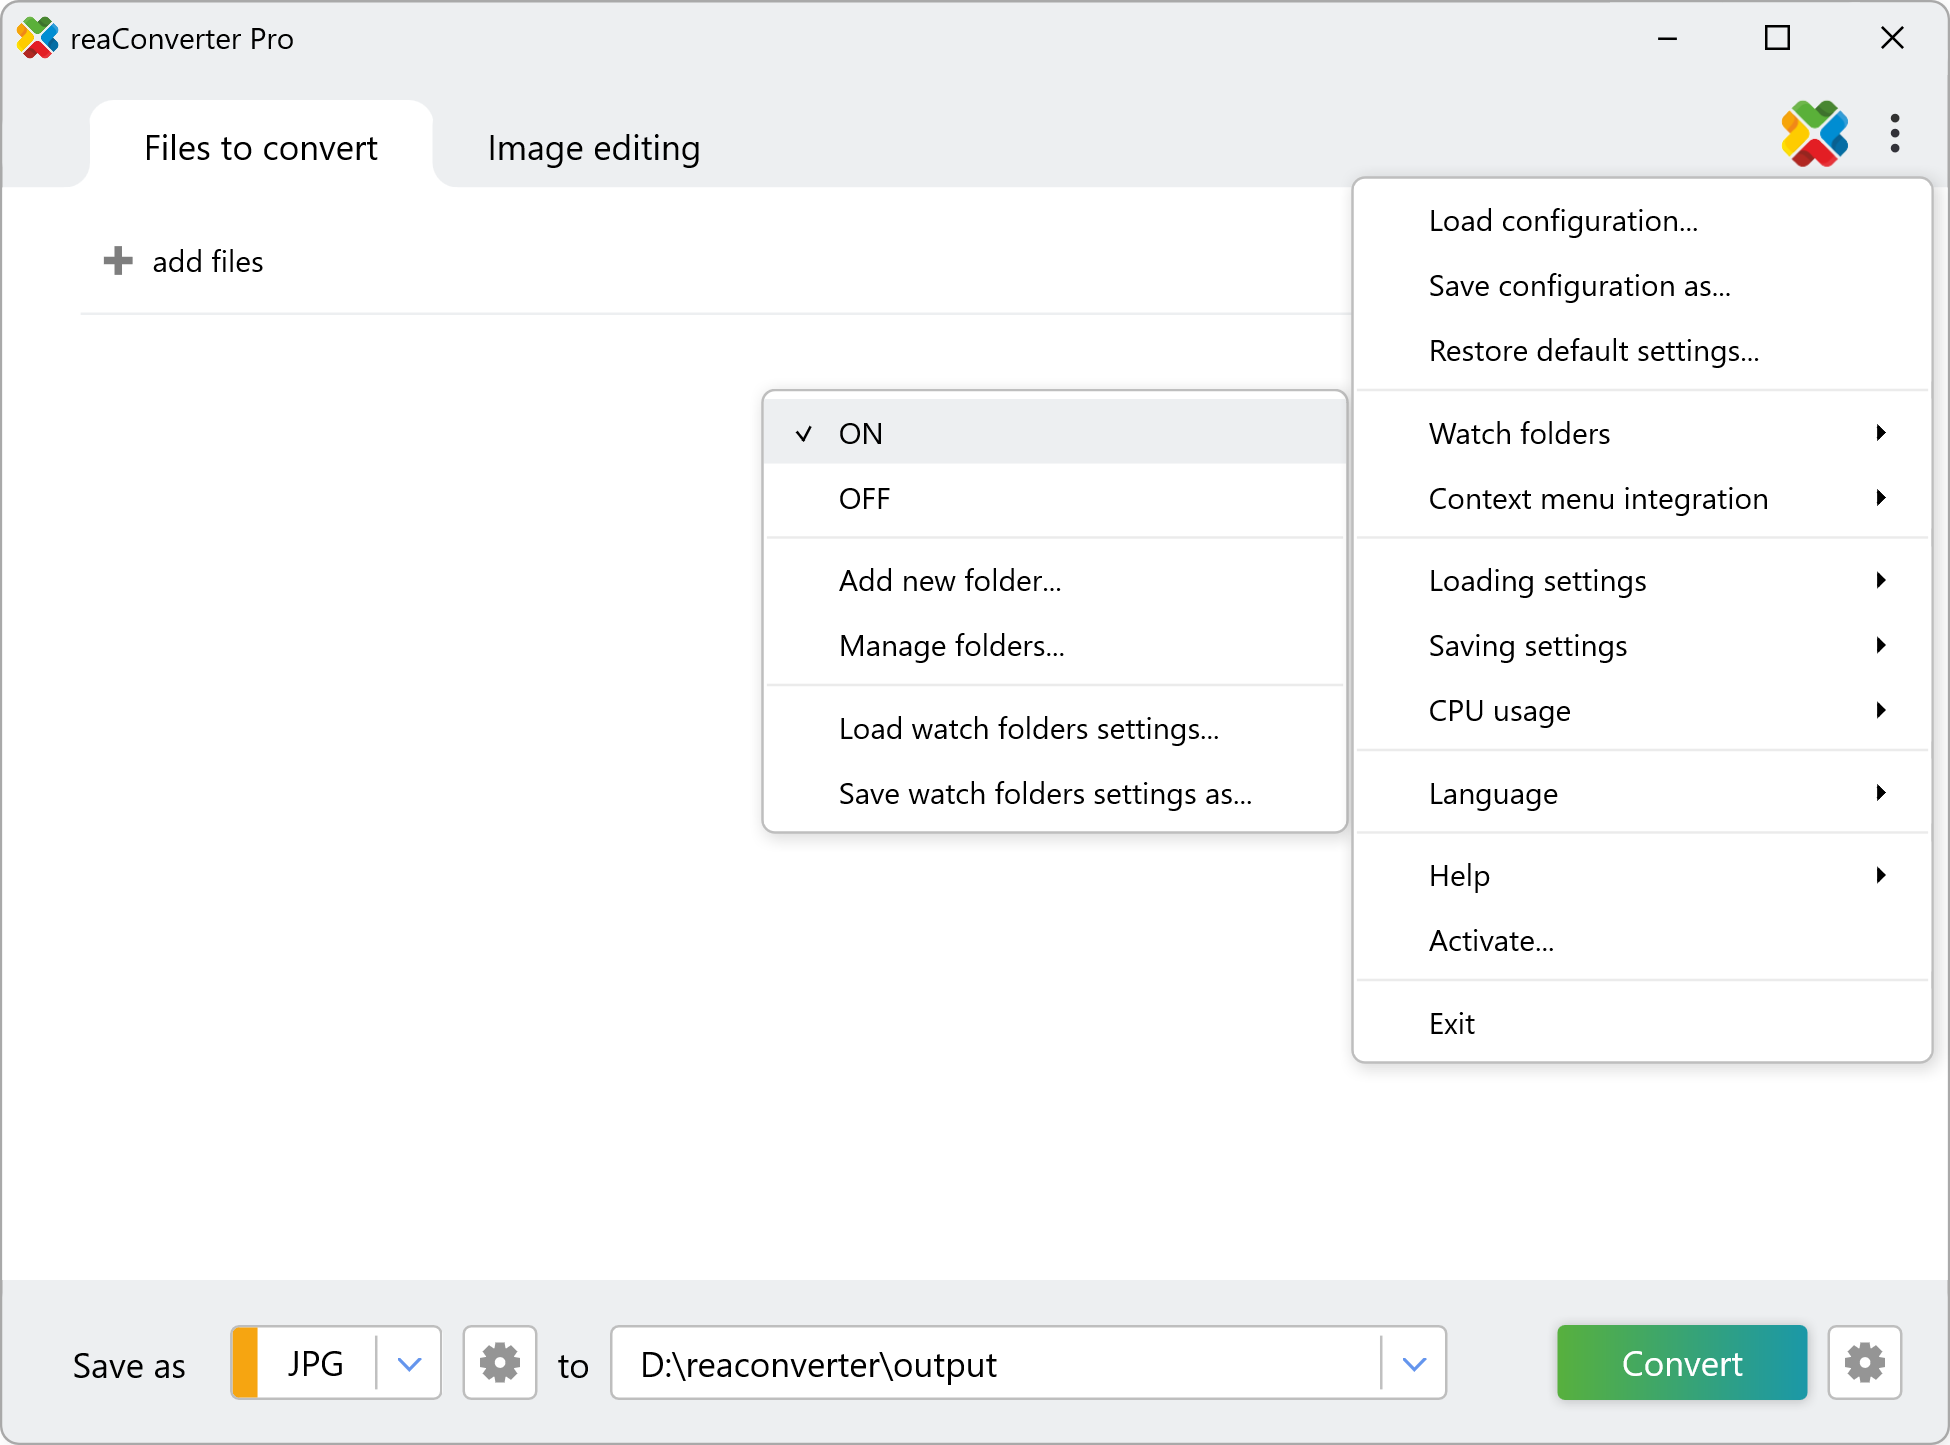
To add a Watch Folder, navigate to Menu → Watch folders → Add new folder, click the + button in the folder list window, then specify your settings by selecting a system folder and browsing for your prepared configuration (.cfg) and action (.act) files.
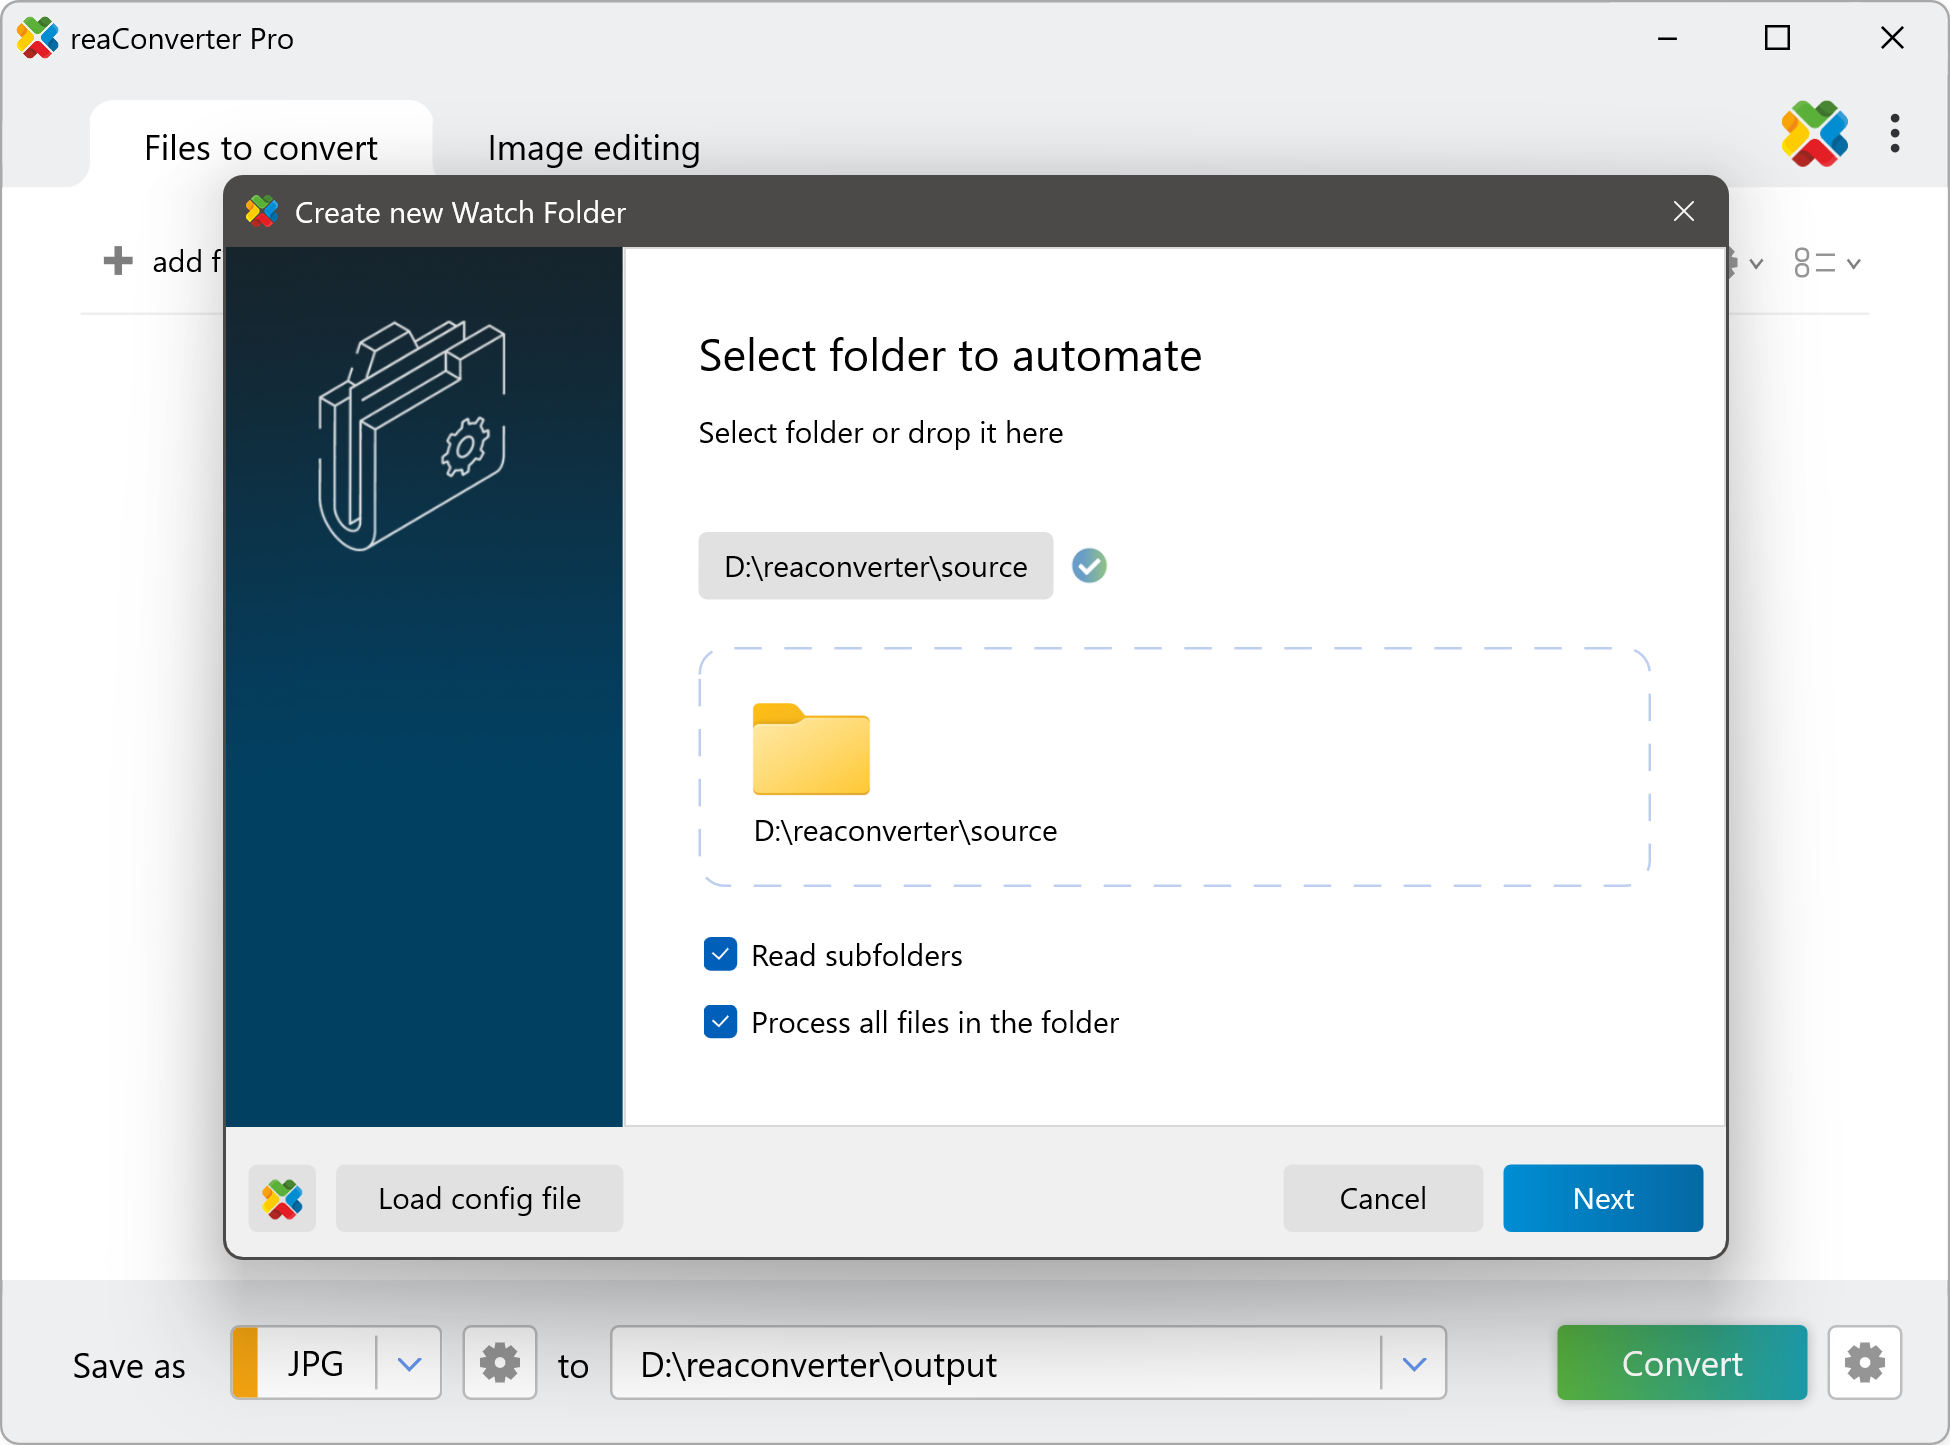
Your setup is complete! Now, any files you drop in the input folder will automatically process according to your .cfg and .act files, with results appearing in the output folder.
You are welcome to contact our technical support when you have any questions about reaConverter.
Watch Folders on your PC
In our video tutorial we will illustrate how to automatically resize and convert images from JPG to PNG format using reaConverter's Watch Folders feature.