Do you want to set a specific image quality for your converted image files? Instead of spending time and effort on this after conversion using a piece of third party software, how about setting the desired quality while you convert the files?
With reaConverter's latest edition you can now easily opt for a specific image quality in the case of JPG, JP2, JXR and WebP files.
Open Images
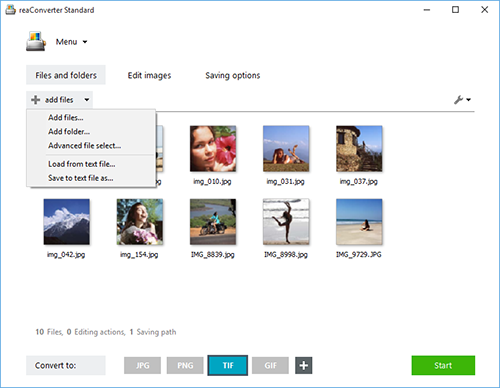
Load all the images you intend to convert. You can add them one by one, add entire folders or use the drag-and-drop tool.

Set Quality
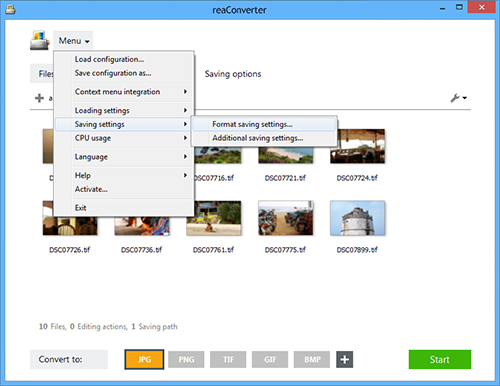
Go to the Menu button and then click Saving settings → Format saving settings

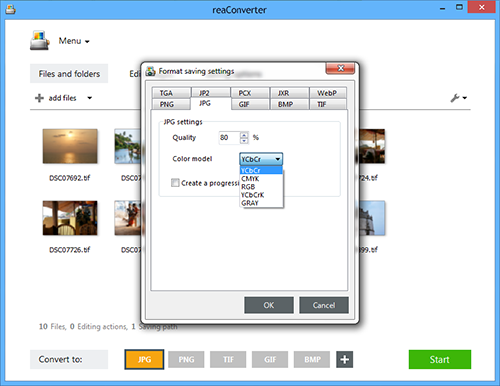
According to your desired output image file format, here you can set the image quality with no more than a few clicks.
In the case of JPG, which is one of the most popular extensions, you can opt for a specific percentage that defines the extent to which you preserve the quality of the input image. Other options include choosing a specific color model (RGB, CMYK, GRAY etc.), or deciding to create a progressive JPG.

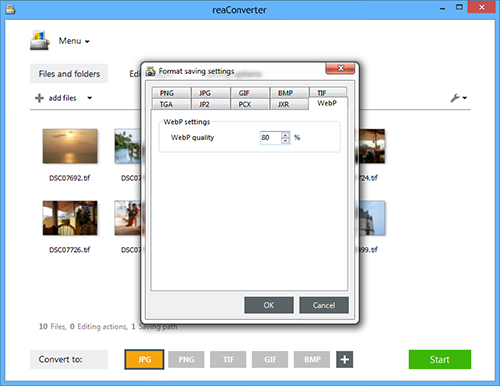
Additional formats whose quality you can customize are also included here: JP2 or JPEG 2000, JPEG XR or JXR and WebP.

Save the Result
In case you don't want to apply any additional image editing, go directly to the Saving options section and choose the desired location for your converted images.

Finally, simply press Start and your new images, including your desired quality, will soon be ready!
Video tutorial
Share
Command-line interface
Advanced users can do the same using command-line interface in manual or automated mode. You are welcome to contact our technical support when you have any questions about reaConverter.
Download reaConverter Pro with CLI