Converting digital cameras RAW images to more accessible formats using reaConverter's latest edition is now easier and faster, and provides you with more customizing options and handy features.
If you're a photographer and like to shoot in RAW mode, you no longer need advanced graphics software when editing and converting images to JPEG, PNG or any other image format you might think of. Adjusting white balance and brightness, applying denoise filter and customizing interpolation can be done with only a few clicks.
Open Images
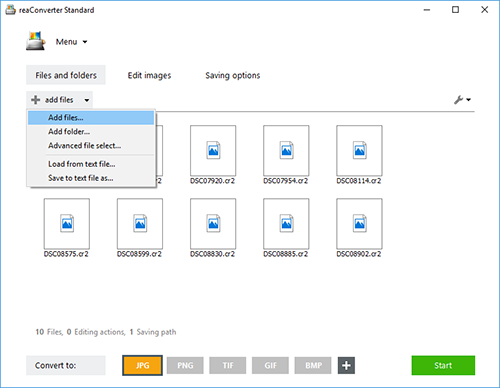
Load one or more RAW file images you intend to convert. Pick them one by one from a local folder, add entire folders or use the drag-and-drop tool.

Tune RAW Loading Settings
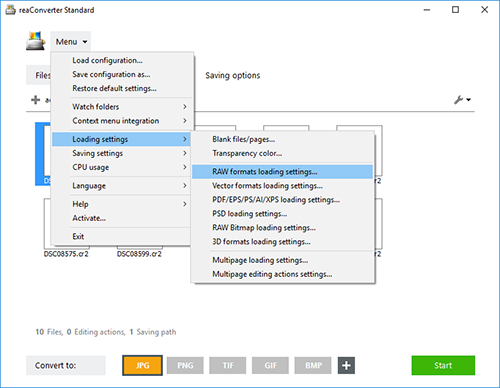
Go to the Menu button and then to Loading settings and RAW formats loading settings.

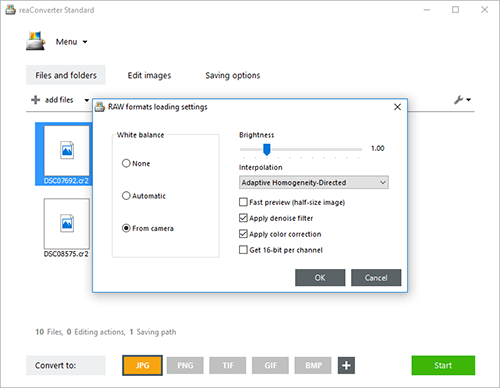
Next you will be able to use reaConverter to quickly adjust white balance, brightness and interpolation, or apply denoise filter and color correction. For example, in the video tutorial below we used a NEF image — the RAW format for Nikon cameras, to which we increased brightness, opted for no white balance, applied denoise filter and color correction.

Save the Result
Go to the Saving options section and pick a location for your converted images. reaConverter allows you to save locally, in the source folder or in a newly created folder placed in a location of your choice. Finally, pick the extension of the output files from the buttons conveniently placed in the lower part of the screen.

Then press the Start button and you will soon be able to enjoy your newly converted files!
Video tutorial
Share
Command-line interface
Advanced users can do the same using command-line interface in manual or automated mode. You are welcome to contact our technical support when you have any questions about reaConverter.
Download reaConverter Pro with CLI