Many amateur and professional photographers love the square format! Why? Not just because it fits Instagram perfectly, but also because it has some of the vintage atmosphere of old Polaroid photos and allows an improved composition of the image.

Applying the square format to a single image or to an entire folder is now easier than ever with reaConverter's latest edition. A new feature called Auto Square lets you do this is in no more than a few clicks.
Open Images
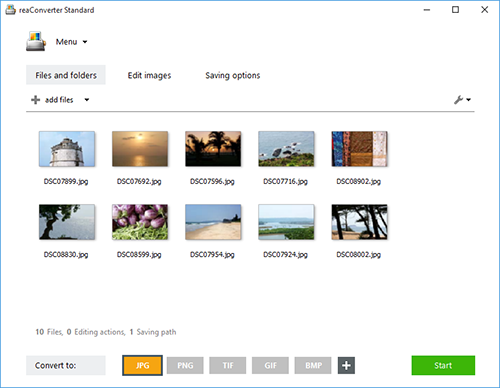
Open one or more images you intend to edit. Pick them manually from your hard drive or use the drag-and-drop tool.
Auto Square
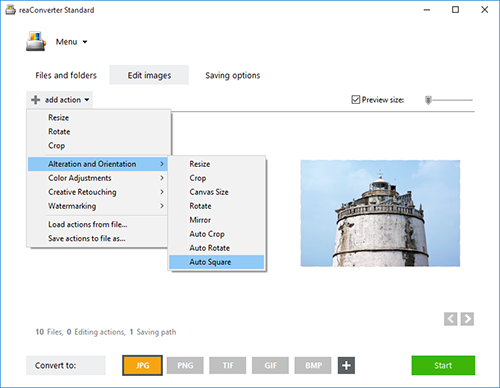
Go to the Edit images tab and then click Add action → Alteration and orientation → Auto Square
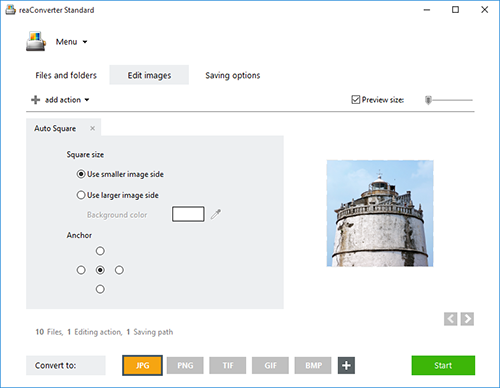
Here you can choose whether to use the smaller or the larger image side, as well as the background color and anchor position. Check your choices in real time by ticking the Preview button.
Save the Result
In the Saving options tab, decide on a destination for your newly edited images.

Finally pick the format of the output images from one of the buttons placed in the lower part of the window, and then simply press Start
Video tutorial
You are welcome to contact our technical support when you have any questions about reaConverter.
Share
Command-line Interface
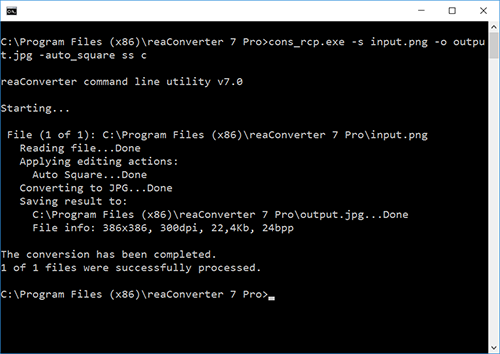
Advanced users can do auto square using command-line interface in manual or automated mode. reaConverter Pro edition provides a command-line tool called cons_rcp.exe
Auto Square command-line example:
cons_rcp.exe -s "C:\Path_to\input_file.jpg" -o "C:\Path_to\output_file.jpg" -auto_square ss c
Manual:
-auto_square (makes square image)

Optional parameters:
  1. Square size (Syntax: ss, ls)
     where "ss" means smaller image side, "ls" means larger image side
  2. Image alignment (Syntax: t, l, c, r, b)
     where "t", "l", "c", "r", "b" mean top, left, center, right, bottom
  3. Background color (Syntax: rgb(66,137,212), hex(4289d4))

Example:
  -auto_square ss c
Command-line auto squaring tool is an advanced feature meant for professional use, and is available in Pro edition only.
Download reaConverter Pro with CLI