Whether you prefer to save your images in JPG, BMP, PNG or other popular and less popular formats, reaConverter now allows you to apply a series of settings that help you customize the conversion process the way you want.
For example, in the case of JPGs you can opt for preserving only a certain percent from the quality of the input file, you can pick a particular color model (CMYK, RGB, GRAY and others) or create a progressive JPG.
Open Images
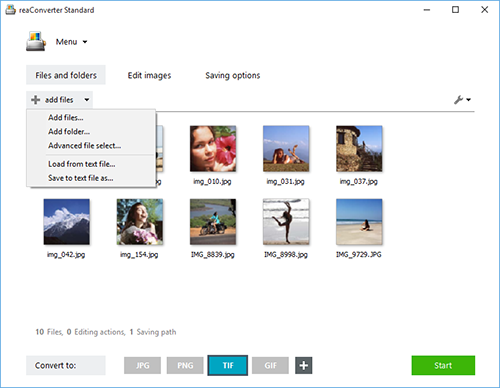
Add one or more image files you intend to convert. Select them one by one or drag-and-drop them directly into the reaConverter window.

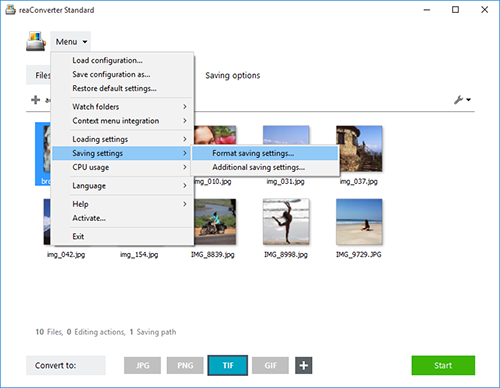
Go to the Menu button and then to Saving settings → Format saving settings.

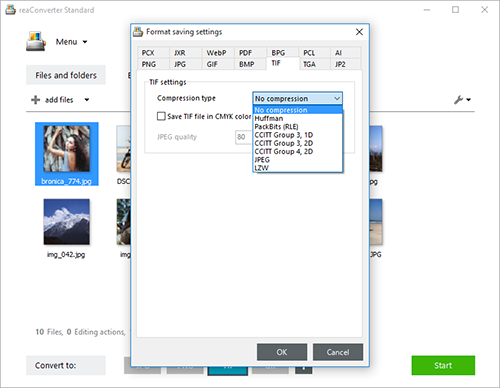
Here you will find 10 different tabs for 10 of the most frequently used image formats: PNG, JPG, GIF, BMP, TIF, TGA, JP2, PCX, JXR, WebP.

Each tab offers a series of tools and settings that help you control and customize the conversion process in an easier and more accessible way. For example, you can make a transparent PNG file by simply ticking the appropriate box, you can create a compressed BMP file or select from several types of compression in the case of TIF files.
Save the Result
In case you don't want to add any image editing, go directly to the Saving options section, where you can pick the location and format of your images. You can easily opt for saving in a local folder of your choice or saving online, using your storage cloud.

Finally, pick the extension of the output images from the buttons placed in the lower part of the window and then simply press Start. Your new images will be done in no time!
Video tutorial
Share
Command-line interface
Advanced users can do the same using command-line interface in manual or automated mode. You are welcome to contact our technical support when you have any questions about reaConverter.
Download reaConverter Pro with CLI