Did you shoot several large-sized photos with your camera and would now like to send them by e-mail or upload them to your website? Or perhaps you would like to transform one or more of them into a letterhead or a blog header? In any of these cases or in other similar ones, you will need to resize your pictures.
Some people think that resizing a group of images requires a long and repetitive set of operations and the use of an expensive image design software. We can prove batch resizing can be free and simple when you use a quality piece of software such as reaConverter. Apart from being a powerful image converter, reaConverter also works great as an image resizer. All you need to do is download and install Lite edition from download page and get free registration key from purchase page.
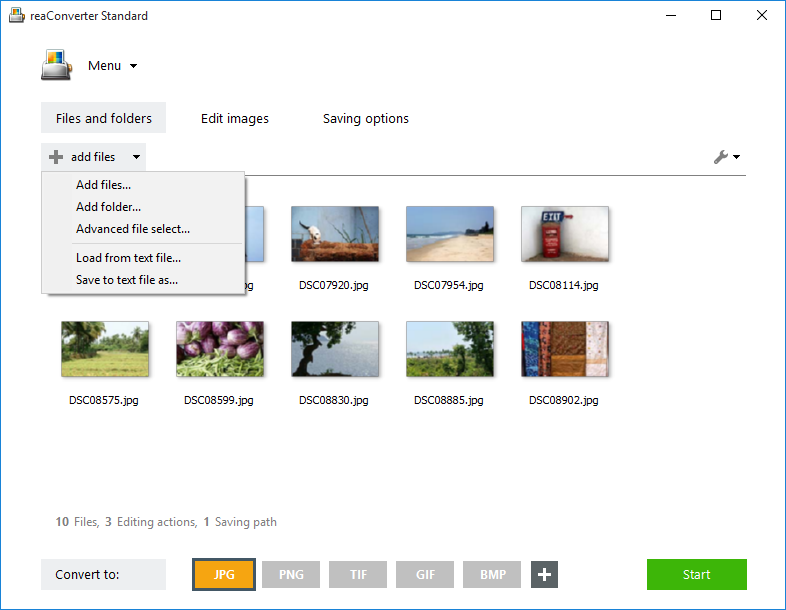
Load Pictures into reaConverter
Start reaConverter and load all the desired images and proceed with the resizing process.

Resize Pictures
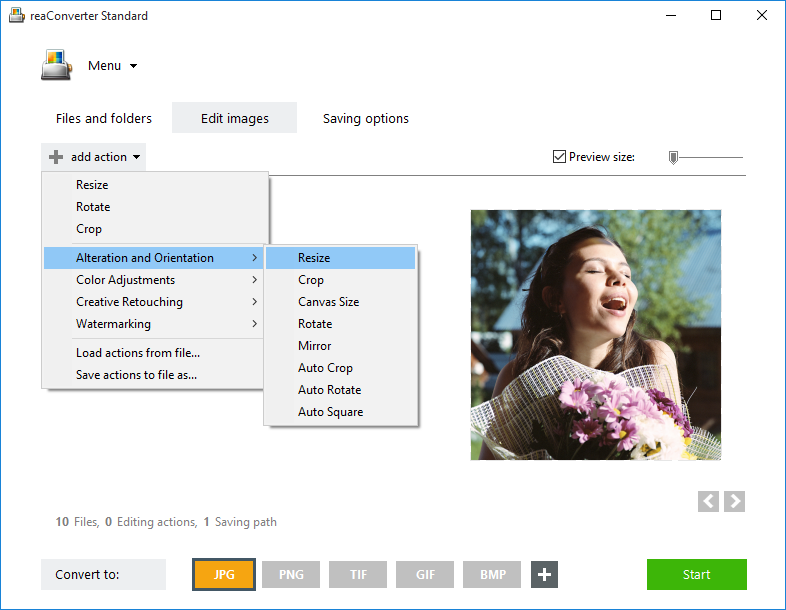
On the Edit Images tab, click on the + Add action button and then pick Resize from the dropdown menu.

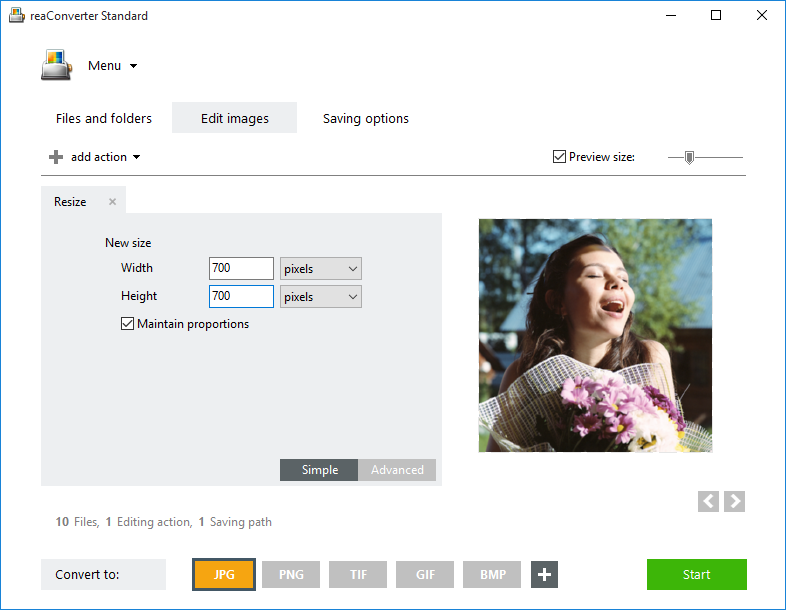
You will now be able to customize the new size of your images by entering the desired number of pixels for width, height or both, or by entering the image resolution.
For example, if you intend to upload your photographs on your website or on a photo sharing network, such as Facebook or Picasa, the optimal resolution is 72 pixels/inch. If you intend to print the images or use them for creating flyers or posters, they will need to be at least 300 pixels/inch. In case you plan to use the images for Powerpoint presentations, the width and height generally recommended is 1024×768 pixels.

In case you are not sure which figures to insert for width and height, you can insert only one of the two — selecting for example height (keep aspect) — and the other will be deduced automatically so as to preserve de initial ratio of the image. To check how the image will look like in real time, tick the Preview button.
Save the Result
After selecting the new size for your images, go to the Saving options tab and decide where you want to save the resized pictures.

In case you are only using reaConverter as an image resizer, the output extension of the image will be the same as the input one. If you are also making use of this software’s proficient conversion services, you can pick an extension from the long list of options available for the output format.
Then simply start the conversion process and your newly resized images will be available in no time!
Video Tutorial
Online Pictures Resizer
reaConverter is a highly efficient tool for managing a large amount of pictures. However, if you are planning to resize only a few pictures and only once in a while, then you can also try free online resizer: imverter.com
Advanced users can resize pictures via command line interface in manual, automated or scheduled mode. You are welcome to contact our technical support when you have any questions about reaConverter.