There is a variety of 3D graphics formats available out there and they can be created using quite a few types of specialized programs. From Autodesk software to Blitz3D and QuickDraw to Blender, there is a long list of software using over one hundred types of 3D output formats.
However, not all enjoy a lot of popularity and some provide more advantages than others. For this reason, converting between 3D extensions might be a great way to improve the accessibility of your files while at the same time preserving their quality content intact. And it can be done in no more than a few clicks using reaConverter’s latest edition.


For example, conversion from STL to DWG formats can not only be done fast and easy, but also includes a series of handy customizable features. STL is a computer-aided design (CAD) 3D format used in model prototyping through stereolitography, 3D printing and computer-aided manufacturing. While supported by several software packs, STL enjoys less popularity than DWG, which is probably the most widely used format for CAD modeling. A native format for Autodesk software, DWG is supported by most CAD programs, including AutoCAD, Caddie, IntelliCAD and many others.
reaConverter’s latest edition offers several options for customizing both input and output images when converting between 3D formats, including features such as 3D image rotation or selecting the desired release of AutoCAD for the resulting image.
Start reaConverter and Load Your STL Images
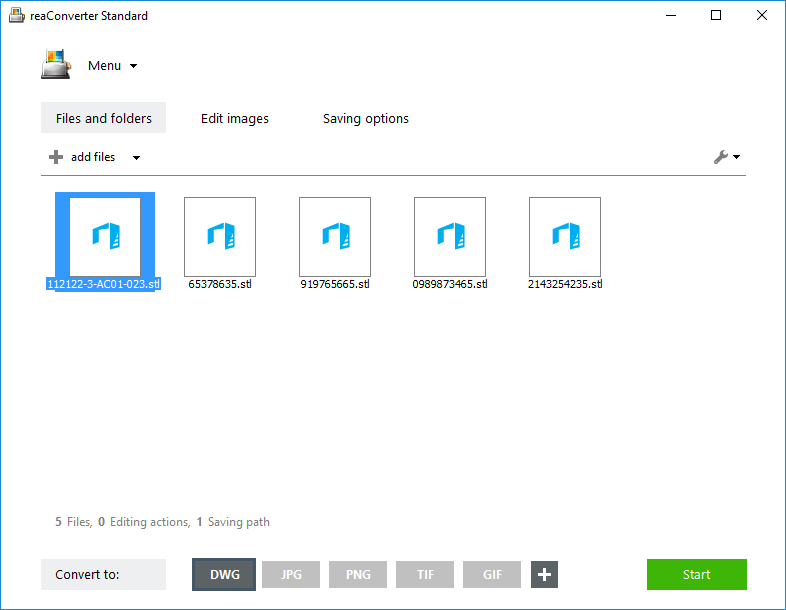
Load one or more STL images into reaConverter. When dealing with lots of images, you can avoid the hassle of picking them one by one from a folder and use the “Advanced file select” option. This way you can automatically select all files with the STL extension from a folder which consists of several others as well. reaConverter also allows you to add entire folders, browse manually or use the drag-and-drop tool.

Tune 3D Formats Loading Settings
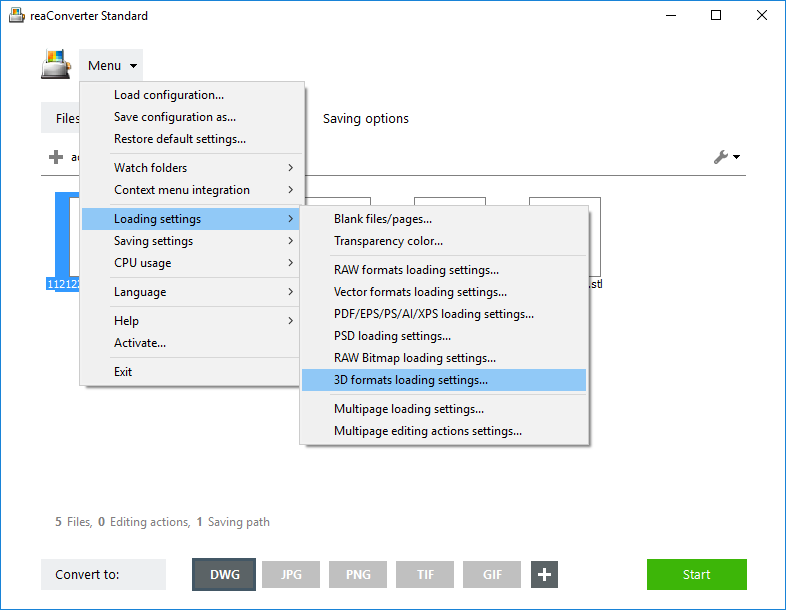
Go to the Menu button and select Loading settings → 3D formats loading settings

Here you can opt for rotating the 3D image by a desired number of degrees for each of the 3 axes. X is the horizontal axis, Y is the vertical one, while Z allows you to move the object clockwise or counterclockwise.
Choose DWG Saving Settings
Next, go back to the Menu button and select Saving settings → Format saving settings

Then pick the DWG tab and decide which release of AutoCAD you would like your output 3D files to be compatible with.

Save Your Result
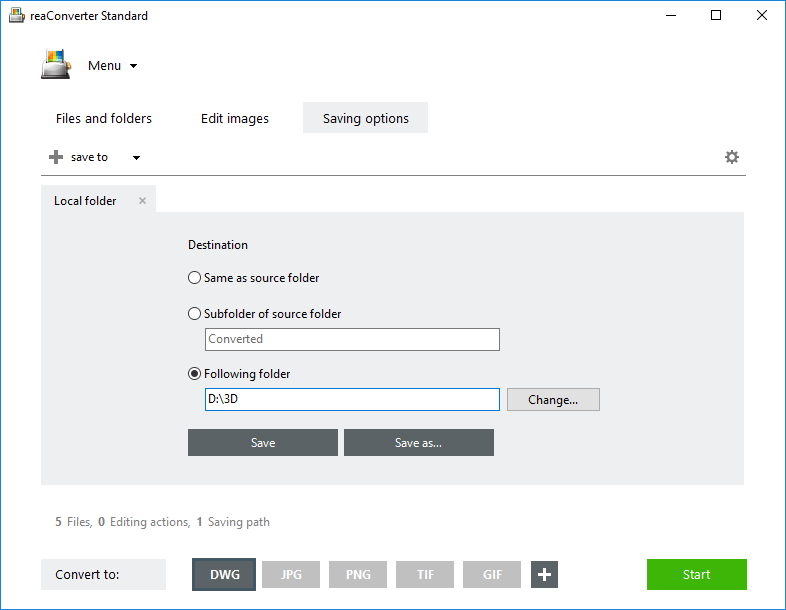
Go to Saving options and decide on the destination of the output DWGs. Pick one of the handy choices for offline storage — same as source folder, subfolder or customized folder. Finally, don’t forget to select DWG as the desired output format from the buttons conveniently placed in the lower part of the window.

Then simply press Start and your newly converted 3D images will soon be ready!
Command-line interface and DLL
If you are a developer interested in including STL to DWG conversion as part of a customized software solution, reaConverter allows you to operate this feature via command-line, using a tool called cons_rcp.exe. For example, for automated batch conversion of STLs to DWGs, using different source and output folders, you can use this code line:
cons_rcp.exe -source_folder "C:\Path_to\input_folder\" -source_ext stl -dest_path "C:\Path_to\output_folder\" -dest_ext dwg
A full list of configuration parameters is available on Command Line Interface Reference Guide
Video Tutorial
You are welcome to contact our technical support when you have any questions about reaConverter.