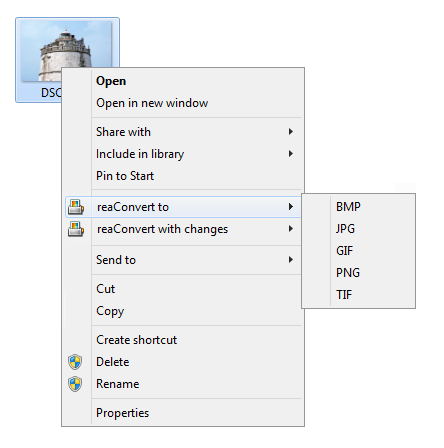
When you use a piece of quality software, batch image conversion doesn’t have to be a difficult, time-consuming or dull and repetitive process. In fact, image conversion can take you no more than 2 clicks! For this reason we recommend using reaConverter’s right-click conversion feature. How does it work?
Install reaConverter
Download and install this user-friendly conversion software from reaconverter.com. Try it for free by making full use of its free trial period.
It won’t take you more than a few minutes to get acquainted to its menu — it really works intuitively and it’s easy to operate.
Enable context menu integration
Open reaConverter, go to the Menu and then to Context menu integration. Tick on the ON option.
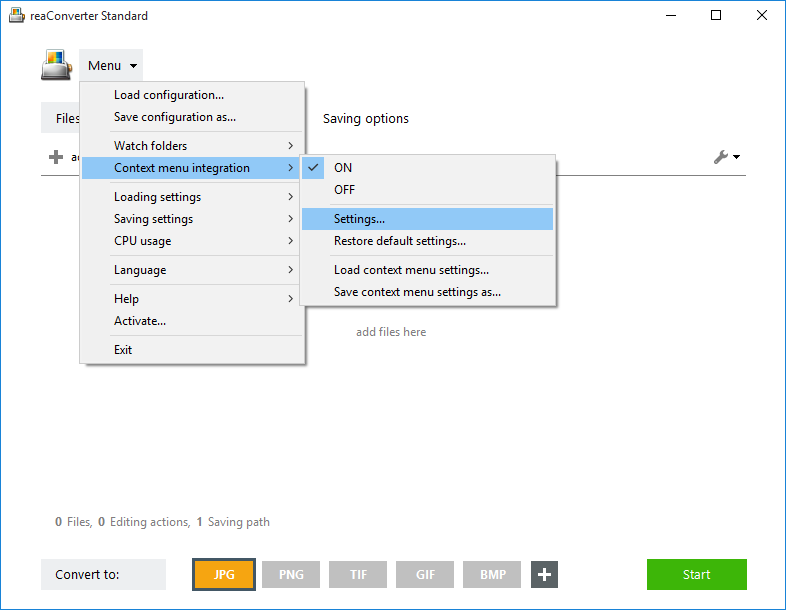
Now every time you want to convert images, you can do it straight from your Windows Explorer window, without having to open reaConverter. Here’s how.
Right click conversion
Select one or more images that you intend to convert. Right-click on them and…

Choose Convert to… and then click on one of the options from the dropdown menu: JPG, GIF, PDF, PNG, TIF. If your desired output format is not among the extensions on this list, don’t worry, the list is customizable.
Go back to reaConverter, open the Menu and go to the Context menu integration → Settings.
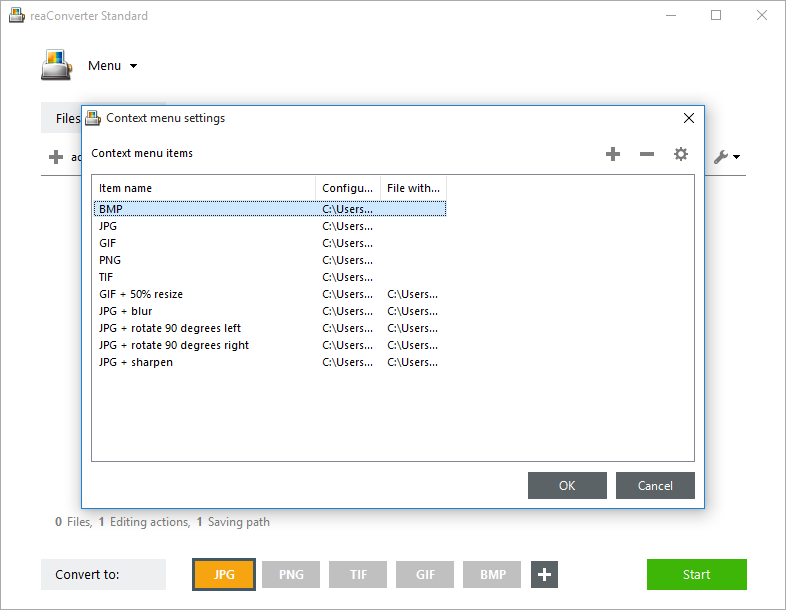
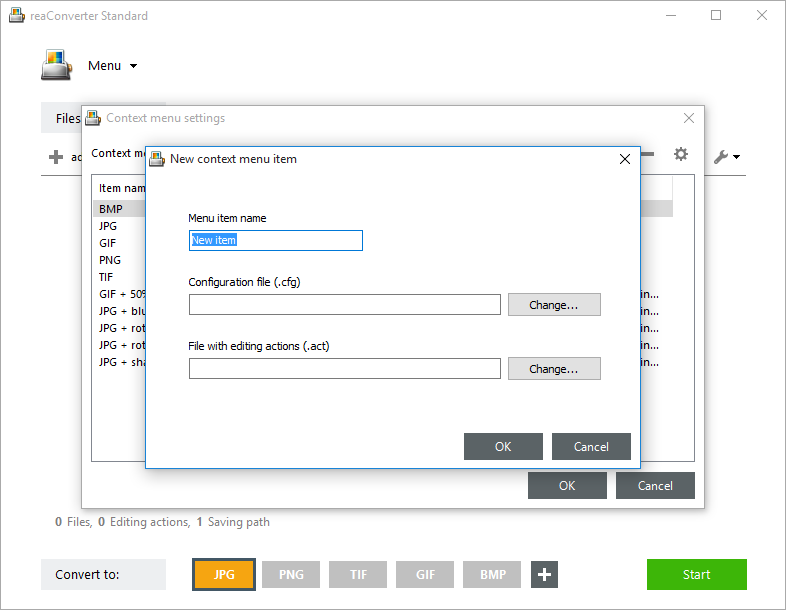
Here you can add, modify or delete context menu items, by linking reaConverter configuration (.cfg) and action (.act) files.
To add a new option, click the + sign and specify all the necessary settings in the window that appears: give your new option a name and browse for the prepared configuration and action files. You can read more about reaConverter’s config and action files here.
Config file
To create a .cfg file, start by selecting the desired output format from the buttons placed in the lower part of the screen, and the destination folder, from the Saving options section.
And you can also apply Format settings for each format, such as converting to transparent PNG or compressed TIFF, or other Additional saving settings, such as copying EXIF information from original file or saving all processed files to one file.
All the configuration information will be saved in config .cfg file.
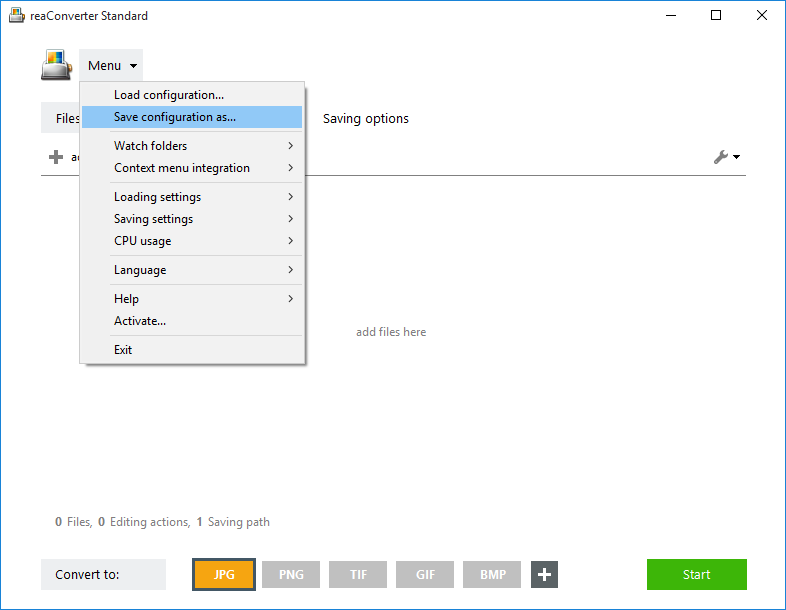
Action file
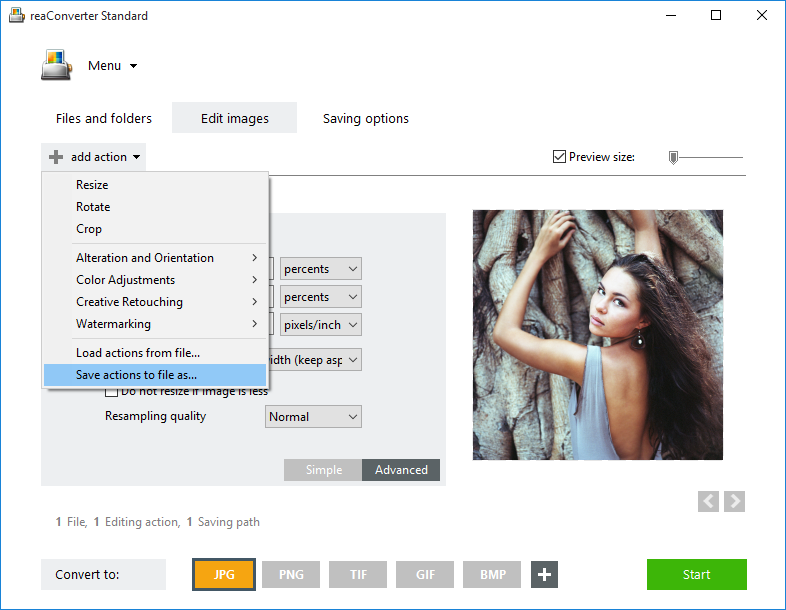
To create an .act file, go to the Edit images tab and select one or more editing features from the Add action button. Then press Save actions to file as…, and your .act file will also be ready.
Now you are ready to create new context menu item:
With right-click conversion, transforming your image files can happen really fast and easy, by simply selecting all the desired images and clicking twice. Converting images can’t get easier than this, so make sure you have this feature installed on your computer!
Video Tutorial
Advanced users can convert images using command line interface, watch folders or DLL in automated mode. You are welcome to contact our technical support when you have any questions about reaConverter.